Image Browser · Burnham-on-Sea History Project
Admin Guide: running the Image Browser
For the people who look after the Image Browser: logging in, changing the admin password, and bringing new photos and spreadsheet changes onto the site. You'll need to be comfortable using a web browser; no technical knowledge is needed beyond that.
1. First time: change the default password
Do this first, before anyone else uses the Image Browser. A new Image Browser comes with a default admin password, which whoever installed it will give you. It's the same on every new installation, so anyone who knows it could log in and run imports: change it the very first time you log in.
- Open the Image Browser and click Admin at the top right (next to Help).
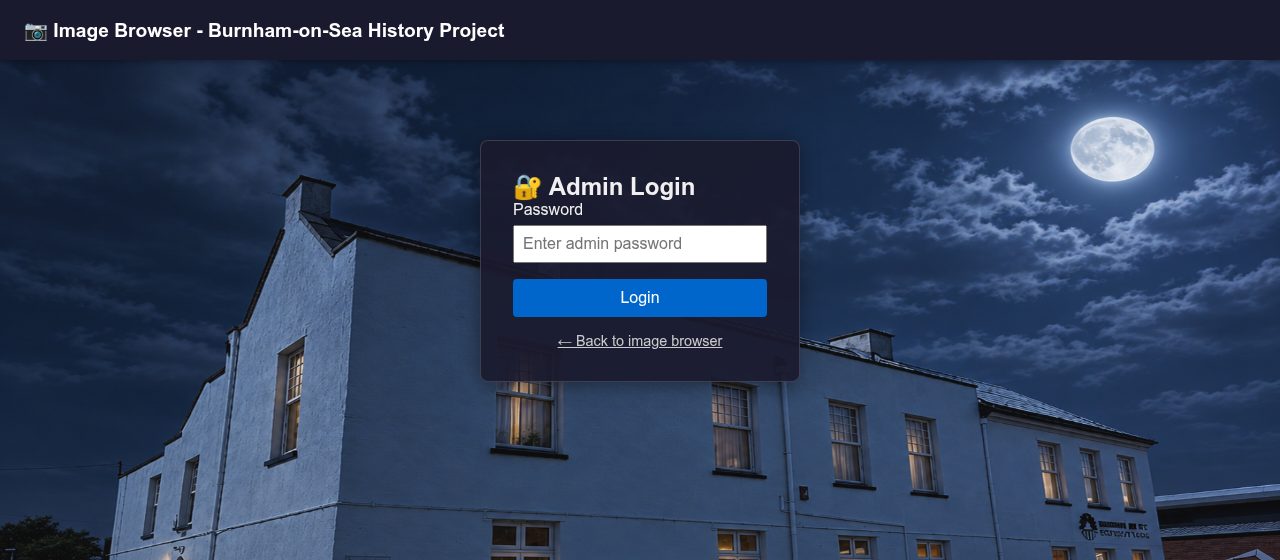
- Type the default password in the Password box and click .
- The Admin Panel opens with a red warning across the top:

- In the 🔑 Admin Password box on the right, type:
- Current password: the default password
- New password: your new password, at least 8 characters long
- Confirm new password: the same new password again
- Click . Under the button you'll see "✓ Password changed successfully."
- Click ← Back to image browser, then Admin again, and log in with the new password to check it works. The red warning has gone.
Choosing a password: a few unrelated words strung together, such as
harbour-kettle-violet-1911, is long, hard to guess and easy to remember. Keep it
somewhere safe that the other admins can get to, such as the centre's password book or a
password manager. There's only one admin password, shared by everyone who runs the Image
Browser.
2. Logging in and out
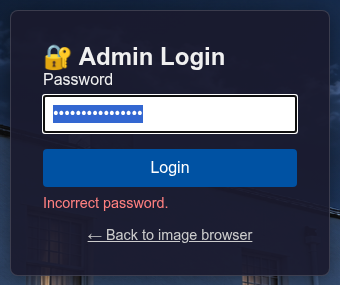
- Wrong password: you'll see "Incorrect password."; just try again.
- Too many tries: after 5 wrong passwords within 5 minutes, the Image Browser stops accepting any for a while and says "Too many failed attempts. Try again later." This keeps out anyone trying to guess it. Wait 5 minutes, then try again carefully.
- One admin at a time. If someone logs in on another computer, the earlier login is signed out the next time it clicks anything, and goes back to the login page. That also means you can't be locked out by a computer someone left logged in.
- Automatic log-out: after 30 minutes without using the Admin Panel, you're logged out. Two minutes before, a Still there? box appears: click to carry on. An import that's running carries on regardless.
- Logging out: click at the bottom right of the Admin Panel when you've finished, especially on a shared computer.
3. The Admin Panel at a glance
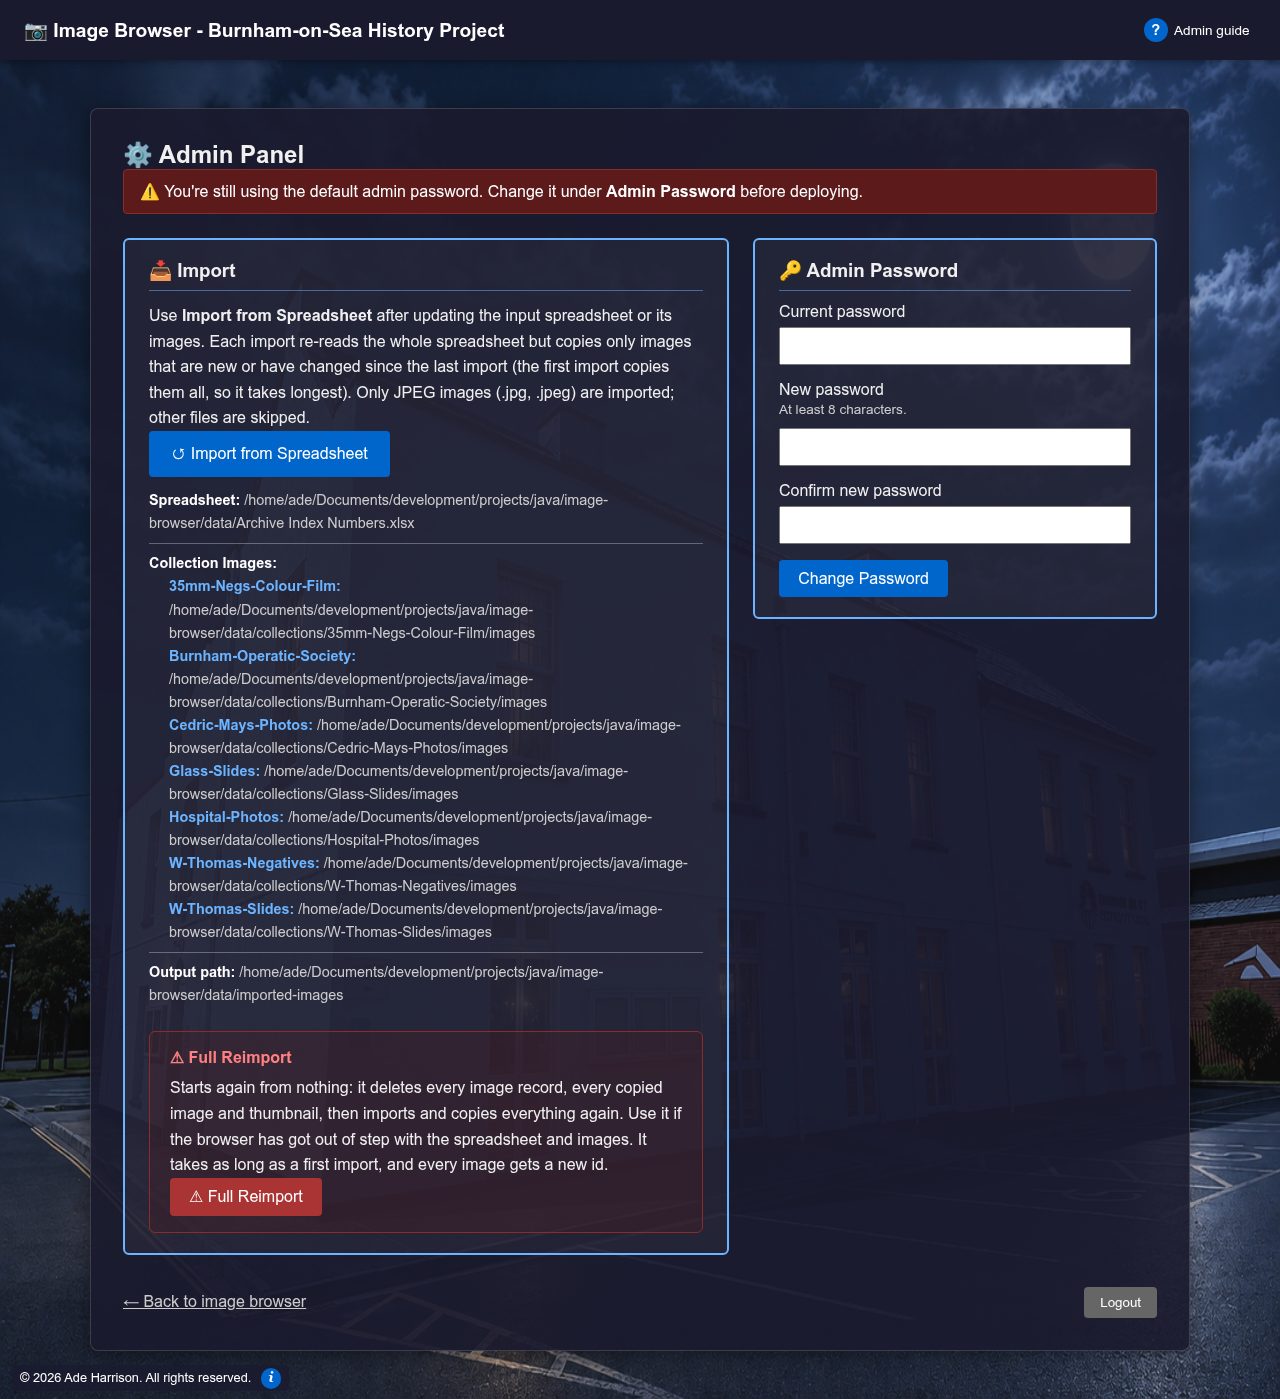
| Part | What it's for |
|---|---|
| 📥 Import (left) | Bringing new and changed photos and descriptions onto the site: Import from Spreadsheet. Under the button: where the photos are read from and copied to, and the progress and result of the latest import. |
| ⚠ Full Reimport (red box) | Throwing away everything on the site and importing it all again. Rarely needed. |
| 🔑 Admin Password (right) | Changing the password. |
| ? Admin guide (top right) | Opens this guide in a new tab. |
| ← Back to image browser / Logout | Back to the photos (still logged in), or log out. |
4. Changing the admin password
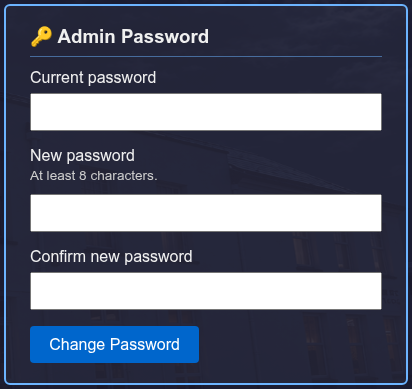
Fill in all three boxes and click , as in section 1. The new password is used from the next login; you stay logged in now. If it isn't accepted, the message under the button says why:
| Message | What to do |
|---|---|
| Current password is incorrect. | Re-type the password you logged in with. |
| New passwords do not match. | Type the new password again, the same in both boxes. |
| New password must be at least 8 characters (and at most 72 bytes). | Use a longer one (or, very rarely, a shorter one: about 70 ordinary letters is the most). |
The box under New password says At least 8 characters., and a password that's too short is stopped by the browser itself before it's sent: it asks you to make it longer.
Forgotten the password? It can't be recovered or shown, only reset,
and that needs whoever installed the Image Browser: they delete the
admin_password_hash row of the app_configs table in its database and
restart it, which puts back the default password. Then change it again straight away.
5. Importing: putting changes on the site
The photos on the site come from two places, both kept up to date by the image maintenance team:
- the photo files (JPEGs), in a folder for each collection on the NAS (the project's shared storage);
- the archive spreadsheet,
Archive Index Numbers.xlsx: one row per photo, with its description, date, category and where its file is.
Changes to either don't show on the site by themselves. An import reads the spreadsheet and the photo folders and brings the site up to date. Run one whenever the team tells you they've added photos or changed the spreadsheet.
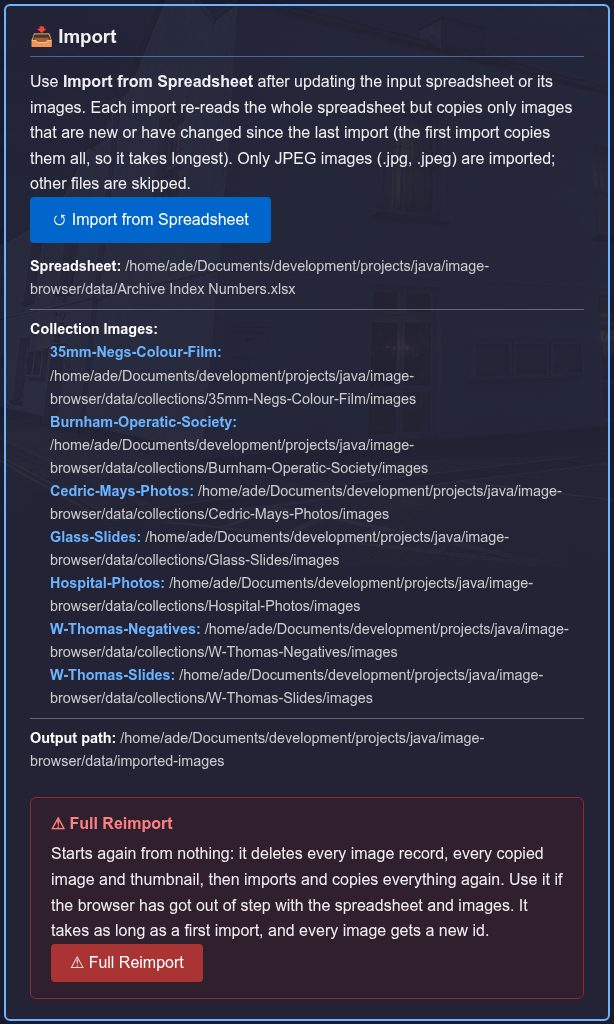
- Ask the team to save and close the spreadsheet first, so the import reads their latest changes.
- Click .
- Watch the progress bar (next section), then read the summary when it finishes (section 8).
- Visit the main page and check the new photos are there. The counts in the collection and category lists are updated by the import.
An import is safe to run as often as you like. It only copies photos that are new or have changed and updates descriptions; it never removes photos from the site, and visitors can keep using the site while it runs. The first import of a new installation copies every photo and can take a long time; after that, imports usually take a minute or two.
Where the photos are read from
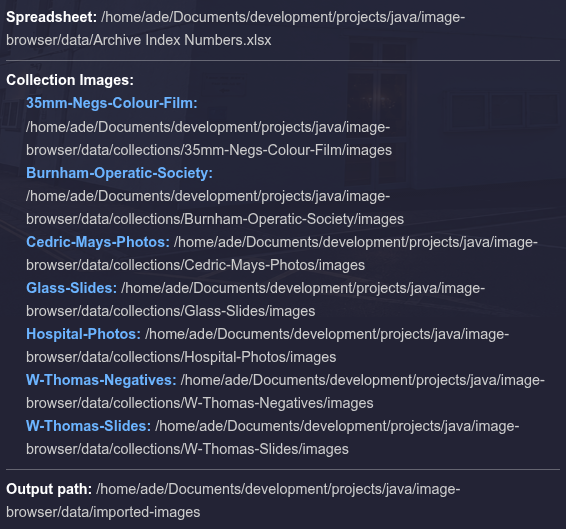
Under the button, Collection Images lists every collection the import reads, each with the folder its photos are read from, and Output path is where the Image Browser keeps its own copies of them. These folders are set when the Image Browser is installed; you don't need to change anything. They're useful to:
- tell the image maintenance team exactly where to put new photos for each collection;
- check, if photos seem to be missing, that the import is reading the folder you expect.
The photos are only read from these folders, never changed. The Image Browser shows visitors its own copies, so the site keeps working even if the NAS is switched off (until the next import).
6. While an import runs
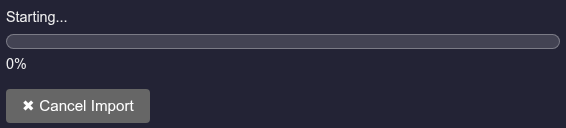
The Import box shows:
- What it's doing, for example Reading AVIATION records…, Scanning input files…, Copying 40 new/changed file(s)…;
- a progress bar and percentage for that step, with details such as Copying 3 of 40;
- for a long step, an estimate: Estimated time left for this step: about 3 min (finishes about 14:32);
- a button (next section).
You don't have to watch it. Closing the page, going back to the image browser or even logging out doesn't stop an import. Come back to the Admin Panel later and you'll see its progress, or how it ended.
Only one import can run at a time. Clicking Import again while one is running just says "An import is already in progress." and shows its progress.
7. Cancelling an import
Click if you started an import by mistake or need the computer for something else. The Image Browser asks you to confirm:
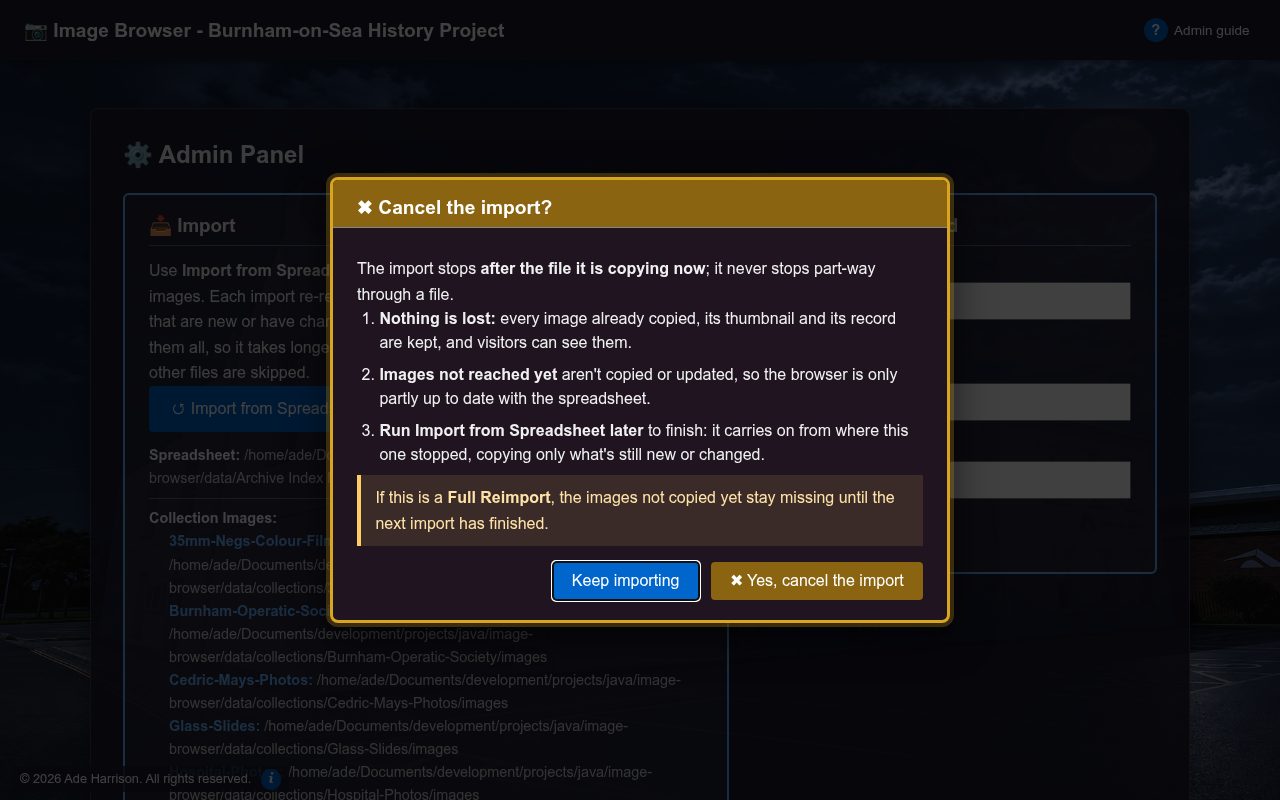
- (or Esc, or clicking outside the box) lets the import carry on.
- stops it, after the photo it's copying at that moment.
Nothing is lost: everything already copied stays on the site. The panel then shows an amber box headed ✖ Import cancelled, saying how far it got, for example "Import cancelled after copying 3 of 40 file(s).", and when it stopped. It stays there, even after leaving and coming back to the panel, until the next import starts (or the Image Browser is restarted). Run Import from Spreadsheet later and it carries on from where it stopped.
8. Reading the import summary
When the import finishes, the box shows a summary. The first line says how it went:
- ✓ Import complete (green): all fine.
- ⚠ Import complete, with N warning(s) and/or N error(s) (amber): it finished, but some things need looking at (see below). Everything else was imported.
The next line, Import method, says whether it was an Import or a Full reimport. Then come the counts:
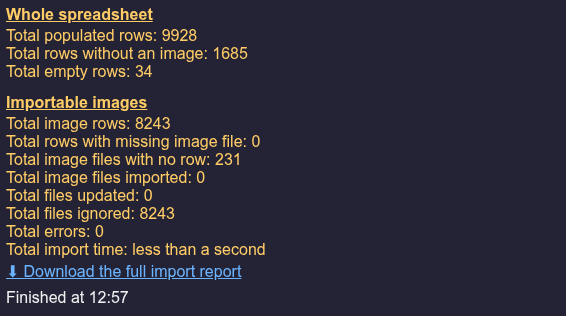
| Line | What it means | Worry? |
|---|---|---|
| Whole spreadsheet (every category sheet) | ||
| Total populated rows | Rows with anything in them. | No |
| Total rows without an image | Rows for items with no photo file (the archive's other records, such as postcards not yet scanned). | No |
| Total empty rows | Blank rows between filled ones. | No |
| Importable images | ||
| Total image rows | Rows naming a photo file: the photos on the site. | No |
| Total rows with missing image file | Rows naming a photo whose file isn't where the row says. Usually a typing mistake in the folder or file name, or a photo not yet copied to the NAS. | Yes: pass the report to the image maintenance team |
| Total image files with no row | Photo files in a collection's folder that no row names: scanned, but not yet added to the spreadsheet (or named differently there). | Only if they should be on the site |
| Total image files imported | Photos new to the site this time. | No |
| Total files updated | Photos copied again because the file or its description changed. | No |
| Total files ignored | Photos unchanged since the last import (and any files that aren't JPEGs). | No |
| Total errors | Things that went wrong, for example a photo that couldn't be copied. The first 20 are listed. | Yes, if more than 0 |
| Total import time | How long it took. | No |
Under the summary, Finished at 14:32 says when it ended.
9. The full import report
The summary only gives counts. Click ⬇ Download the full import report under it
to save a text file (import-report-date-time.txt) with the same counts
followed by every item behind them:
- each row with a missing image file: its sheet, folder and file name;
- each image file with no row: its collection, folder and file name;
- the rows without an image, the rows skipped (not a JPEG, or the same photo listed twice) with their sheet and row number in the spreadsheet;
- every error.
Open it with Notepad (or any text editor), or email it to the image maintenance team so they can put things right. Only the latest import's report is kept, and only until the Image Browser is restarted.
10. Full Reimport: starting again from nothing
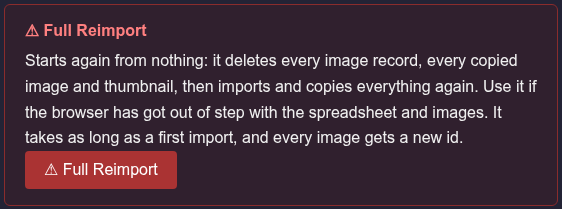
A Full Reimport deletes every photo record and every copied photo from the site, then imports everything again as if for the first time. Because of that, it asks you to confirm with a red warning:
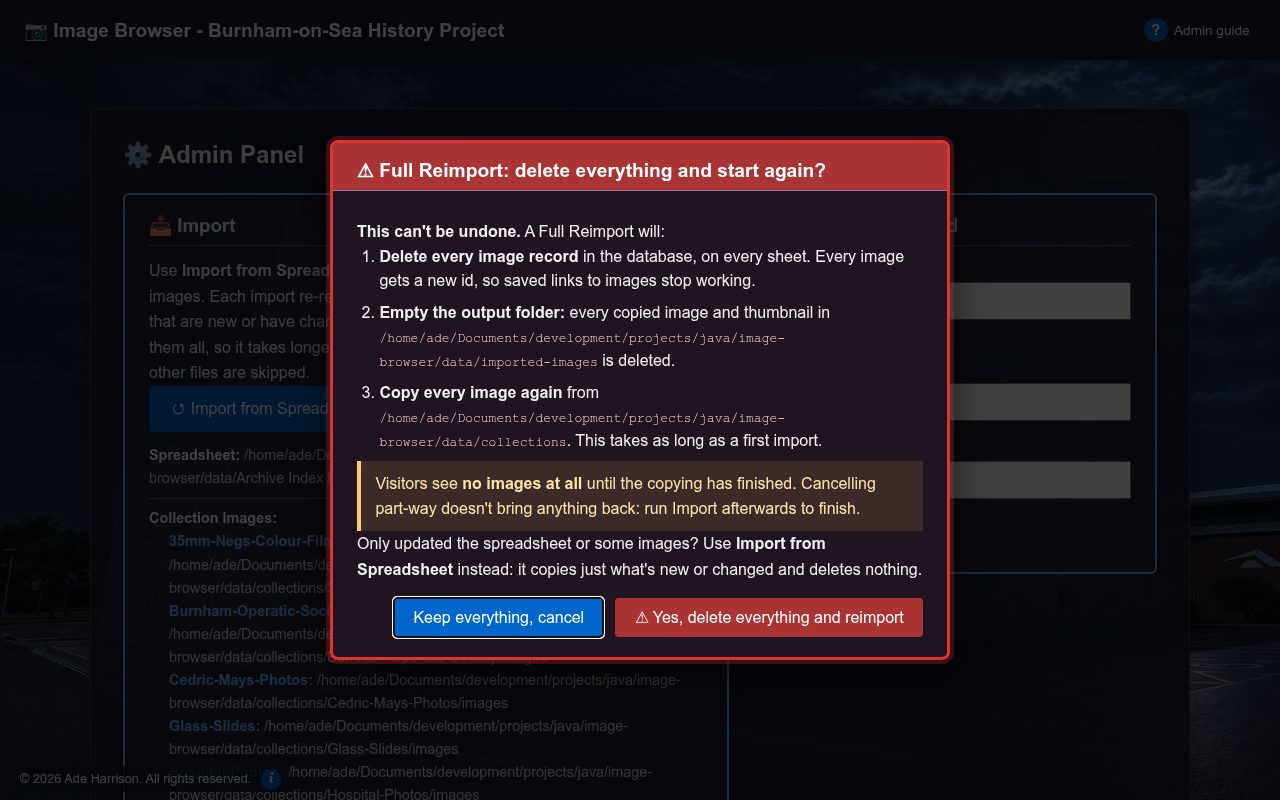
- (or Esc, or clicking outside the box) does nothing.
- starts it.
While it runs, visitors see no photos at all, and it takes as long as a first import: possibly hours for the whole archive. Every photo also gets a new number, so any web links people have saved to a particular photo stop working. Run it when the centre is closed.
If you cancel a Full Reimport part-way, the photos not yet copied stay missing: run Import from Spreadsheet afterwards to finish.
11. Import or Full Reimport?
An ordinary import adds and updates, but never removes. So almost always you want Import from Spreadsheet. You need a Full Reimport only when something has to disappear from the site:
| The team has… | Run |
|---|---|
| added new photos and their rows | Import |
| changed descriptions or dates | Import |
| replaced a photo's file with a better scan (same name) | Import |
| moved a row to a different category sheet | Full Reimport (otherwise the photo shows in both categories) |
| deleted a row, or renamed a photo's file or folder | Full Reimport (otherwise the old one stays on the site) |
| nothing, but the site seems out of step with the spreadsheet | Full Reimport |
Saving the waiting time: whoever installed the Image Browser can back up an import (the database and the copied photos) and restore it later, which is much quicker than a Full Reimport if something goes wrong. Ask them about the backup and restore scripts.
12. When something goes wrong
If an import can't finish, the box shows a red message starting "Import failed while: …" with the step it was on and why. Nothing done before then is lost; fix the cause and import again, and it carries on.
| What you see | Likely cause and what to do |
|---|---|
| Failed while Scanning input files…, saying a folder doesn't exist or can't be read | The NAS is switched off, asleep or not connected. Check it's on, wait a minute and try again. |
| Failed while Reading the spreadsheet… or Reading … records… | The spreadsheet is damaged, or wasn't
saved as an .xlsx file. Ask the team to open it, save it as Excel Workbook
(.xlsx) and close it. |
| Lots of rows with missing image file | Download the report: if they're all in one folder, that folder is probably named differently from the spreadsheet's Folder/Page No. |
| A collection missing from Collection Images | Its folder isn't where the Image Browser expects. Ask whoever installed it. |
| New photos imported but not on the main page | Reload the main page (F5), and check the collection and category lists are set to All. |
| The Image Browser doesn't open at all | Ask whoever installed it. One cause: a category sheet was renamed or deleted in the spreadsheet; the Image Browser won't start without every category sheet it's set up for. |
If the panel shows 🧪 Dry run mode, it has been started for testing: imports only report what they would do, and change nothing. Ask whoever installed it to restart it normally.
13. The library's kiosk PC
The kiosk PC shows only the Image Browser, full screen, with no address bar, tabs or Back button. It signs itself into its kiosk account when it starts. You look after it from your own admin account on the same PC.
| To… | Do this |
|---|---|
| Get from the kiosk to your admin account | Press Ctrl + Alt + Del, choose Sign out, then pick your account at the bottom left of the sign-in screen. If it goes straight back into the kiosk, hold Shift while it signs out. |
| Get back to the kiosk | Restart the PC (or sign out and choose the kiosk account). |
| Run an import on the kiosk PC | On the kiosk itself, click Admin, log in, and import as usual. Click Log out when you've finished, so no visitor can use the panel. If the kiosk restarts after a few minutes without anyone touching it, you are logged out, but an import that's running carries on: log in again to see how it's getting on. |
| Get back to the photos after opening the Help guide | Press the blue button at the top of the guide. The guide opens in a window of its own; the button closes it, and the photos are underneath, as they were. With a keyboard, Ctrl + Shift + W does the same (Ctrl + W doesn't work in the kiosk). |
| Get back to the photos from the login page | Click the site's name at the top left, or press Alt + ← (Back). |
| Any of these, with no keyboard | Wait: after a few minutes with nobody using it (5, as set up), the kiosk starts again at the photos. |